
About
Timeline JS is a Knightlab tool (like StoryMapJS) that allows users to make an engaging and interactive timeline for the internet.
What does it do?
The tool uses a spreadsheet template from Google Sheets to create a media rich timeline that can be used to show events over time and/or tell a story. The timeline can be embedded into websites and shared online.
Why this tool?
You should use this tool to show changes over time, summarize events, or tell a story over multiple slides. TimelineJS is an engaging way to share your research.
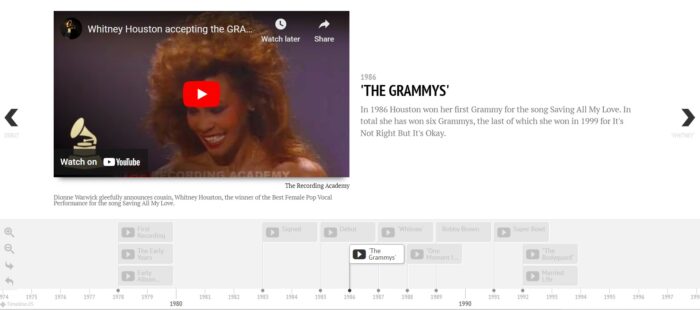
TimelineJS can incorporate a variety of media types; the slides have room for detailed summaries of information. This TimelineJS example shows how to use different media to deliver information.
Getting Started
You will need:
- A Google Account and login
- A copy of the Google Sheets template used to create TimelineJS events
- Links to images, videos, and other media accessed through the internet
Limitations
- TimelineJS uses the modern Western calendar, any other systems need to be converted to be usable.
- Timelines can only be viewed left to right, stories can only be told in one direction.
- The timeline view box is wide and narrow, so photographs and media may need to be altered to fit the dimensions. Generally, you can only have about 50-75 words in the text area before you see a scroll bar.
Tutorials
The video below is an introduction to the tool from TimelineJS.
The following videos walk you through how to customize your timeline.
- Formatting Background Color and Image
- Adding Media
- Using Eras, Groups, and Dates
- Adding and Formatting Text
TimelineJS and WordPress
Method One: iframe HTML code and the Custom HTML Block
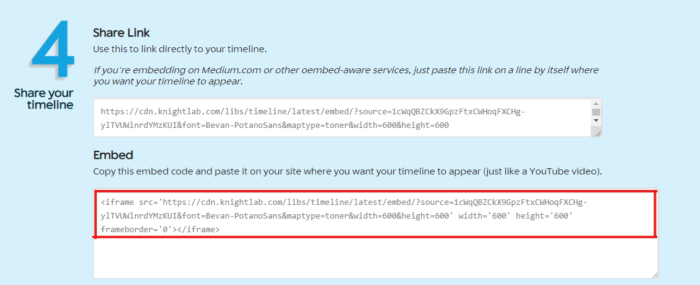
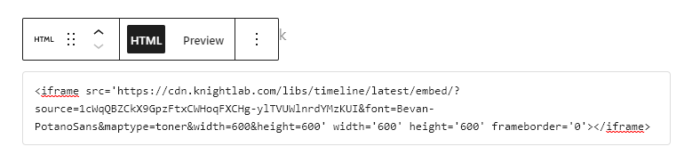
To embed TimelineJS into WordPress, first create your timeline. Then after pasting in the link to your Google Sheet in Step 2 on the TimelineJS website, copy the Embed code from the TimelineJS website, then paste it into a Custom HTML block in WordPress. You only need to do this once, if you make changes to the same Timeline, it will automatically update in WordPress.
Method Two: TimelineJS WordPress Plugin and the Embed Block
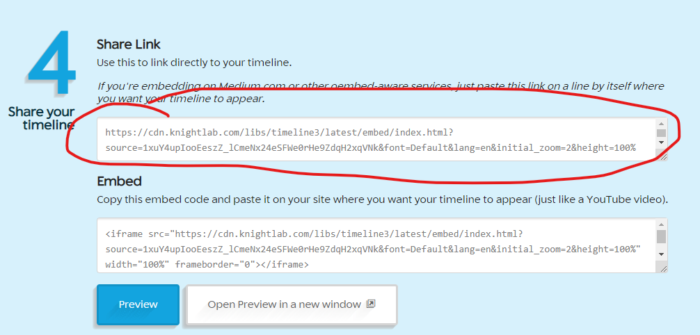
Another option is to use the TimelineJS WordPress plugin. If you install the plugin, then you can use the Embed block and paste in a direct link to the timeline instead of using the iframe HTML.
TimelineJS and ArcGIS Story Maps
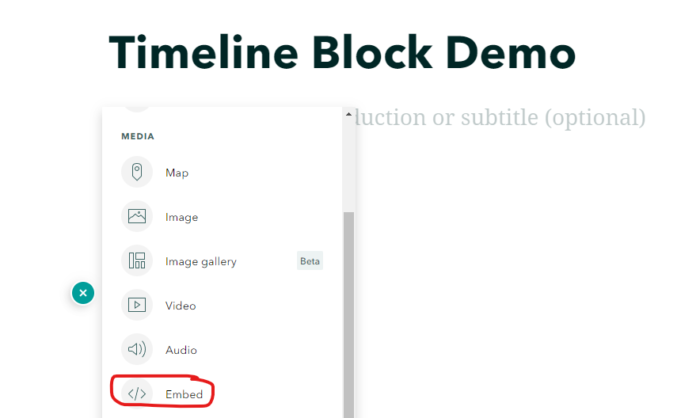
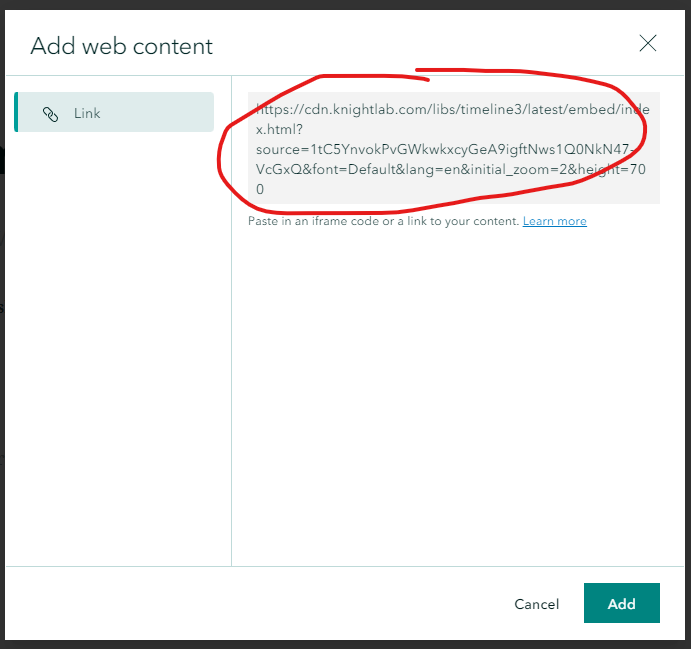
If you’d like to include a TimelineJS timeline in an ArcGIS Story Map, use the Embed block in Story Maps and paste in a link to your TimelineJS timeline.
Using Google Drive to Store Images
If you have images that aren’t online but you want to include them in your timeline (such as images that you took yourself or that you received from an archive via email) then you can use Google Drive to store the images and link to them. This also makes the image have a nice zoomable viewer to see additional details.
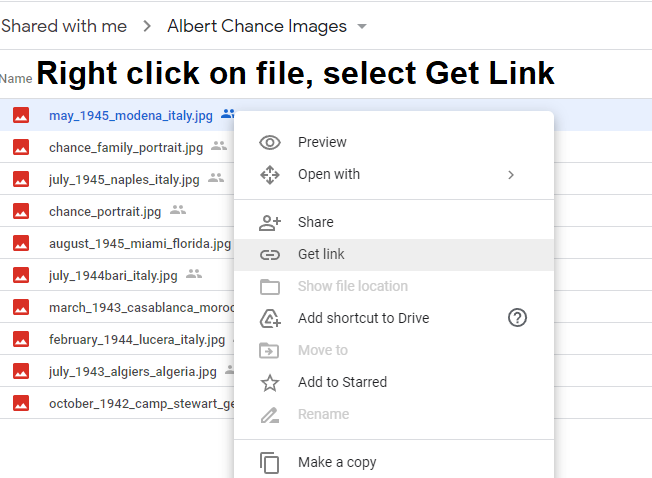
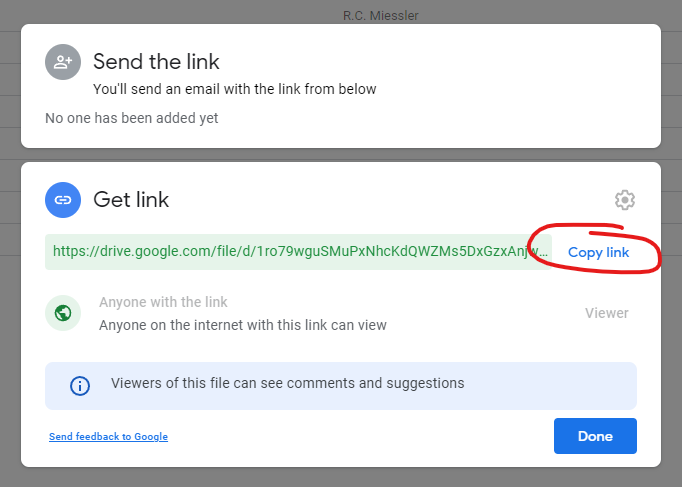
To do this, first create a Folder in your Google Drive for the images and upload the images to the folder. Once this is done, right-click on the image you want to use and select Get link. Select Copy link, then paste the link into the Media section of your event on the TimelineJS Google Sheet.

Using HTML to Enhance Your Timeline
TimelineJS supports adding HTML tags as well, wherever you can input text (Headline, Text, Display Date, Media Caption, Media Credit). This can allow you to add links, blockquotes, and style the text in basic ways.
Adding Links
Since all data in TimelineJS is included as part of the Google Sheet, you have to write some HTML code in order to make text in the timeline link out to other webpages.
For example, if you are doing a timeline event about David Hasselhoff’s influence on German culture, you may want the text on the timeline slide to appear as:
American actor David Hasselhoff is beloved by millions of German fans.
In this case, David Hasselhoff is turned into a link to his Wikipedia article. To do the same thing in TimelineJS, you need to wrap David Hasselhoff (or whatever text you want to turn into a link) with some HTML code:
American actor <a href="https://https://en.wikipedia.org/wiki/David_Hasselhoff">David Hasselhoff</a> is beloved by millions of German fans.Here’s a general template:
<a href="https://www.example.com">Text you want to turn into a link ...</a>
<a> is what’s called a “tag” in HTML and it signifies that a browser should do something different with the information that is between where the tag opens and closes. <a href=" means you are creating a link, and everything between the "" is the URL to the website you want to visit. the > indicates that you’re done with this part of the tag. After the text you want to transform into a link, the </a> closes the tag and indicates that whatever comes after it should no longer be considered part of the link.
It’s recommended to not try to write the code directly into the Google Sheet, but rather use something like Notepad to write it, then copy and paste it in.
Adding Blockquotes as Media
If you’d rather use a quote for your media instead of an image or video, you can use <blockquote> tags. In the Media section of your TimelineJS event, use:
<blockquote>The text of your quote ...</blockquote>
Other HTML Tags
Italics
Use the <em> tag:
<em>Lorem ipsum ...</em>
Bold
Use the <strong> tag:
<strong>Loreum ipsum ...</strong>
Paragraphs
Use the </br> tag:
Lorem ipsum ... </br> Lorem ipsum ...
Or, use the <p> tag:
<p>Lorem ipsum ...</p> <p>Lorem ipsum ...</p>
Other HTML tags can work as well. For more information about HTML tags and formatting, visit the W3C School’s HTML tutorial.
Using a Color for the Background of an Event
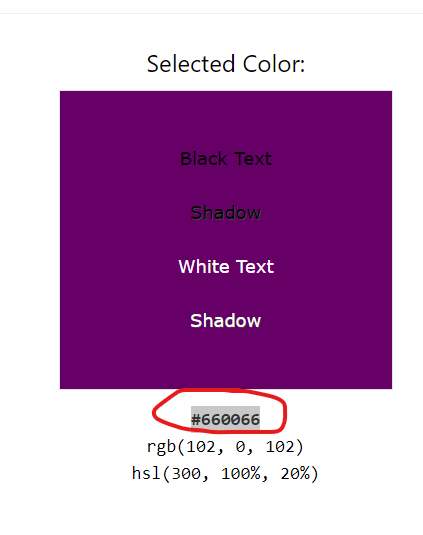
The Background section of an event on the Google Sheet allows you to use either a link to an image or a solid color as the background for a particular event. Background colors are a good way to group similar events together to provide a visual reference. If you want to use a solid color for the background of a TimelineJS event, then you use a hex color code. This would look like #000000 for white or #FFFFFF for black. You can use a color picker to help you figure out what hex code you want to use for the background. Typically, darker colors work better to provide more contrast.For example, if I wanted to have the background of one of my slides be a dark purple, I would use hex code #660066.
Best Practices
- Be clear and concise! Link out to other webpages instead of trying to put too much information on a single event. Your vent headline should reinforce the content and draw in users to read more.
- Keep data in multiple places – in case the Google Sheet has a glitch, or if something gets accidentally erased, you want to make sure your data isn’t only living in one place.
- Events should reinforce each other. You are telling a story with the timeline, so it should be clear why each event is on the timeline. Each event should be a part of the larger narrative. Large gaps in time on your timeline may cause your users to question what happened in the interim.
- Pick media that reinforce the event and your text. Always include a caption that provides some additional context for your image, and a credit to the original. Never assume that your users will see your picture and know what it is. Giving credit back to the original creator is the ethical thing to do. Use the DH Toolkit attribution page for help.
Documentation
- San Diego State University has a Google Doc that walks you through TimelineJS
- Text Tutorial– This text based walk-through of TimelineJS goes into more detail than some of the videos.
- Frequently Asked Questions– Short documentation to help you troubleshoot common problems.
- Supported Media– A full list of media supported by TimelineJS.
- Using TimelineJS– Further documentation for TimelineJS, including links to technical documentation, CSS in TimelineJS, and using TimelineJS in Javascript.